Monday, May 16, 2011

Spring Work

Well, another Spring, means more yard work!  Ha Ha! That's O.K. One day, we will have it all figured out and there will not be so much, but I have yet to figure out what works. I have figured out what does NOT work! Like last years garden! I spent so much time weeding it, I never had time to work in other areas of the yard! Not to mention my skin not caring for all the weeds and such! So this year, I not only downsized the garden, (I give up on growing corn or potatoes) but I also tried to make it as maitenance free as possible.

First, I covered the ground with cardboard boxes, then newspaper, then I laid lanscaping fabric down.
Second,  came the mulch (I used the cheap stuff , $2 a bag, as I add to it each year and don't need as much I may buy the more expensive weed control mulch).
Next, I laid out the boxes ( I had already made them a couple years ago, use untreated wood, and if you know what measurements you need, they will cut it for you at the hardware store). I made sure I had them exactly where I wanted them allowing room for growing plants that will grow well over the boxes.
Next,  I filled the boxes with soil I bought at Menards. I got the cheapest kind specifically for vegetables, I think I paid like $2-$3 a bag.
Finally, I planted the tomatoe and green pepper plants I had started from seed a few months ago and then planted the seeds of everything else in each appropriated (big word huh! ) box.
We'll see how this plan works.
OH! I almost forgot, I also had planted a row of peas in the ground there in the far back, I just cut places in the fabric ( I did not use boxes or newspaper here, I just cut up the sod and laid the fabric down and covered with mulch) where I planted the peas. Once they started coming out of the ground and I could see where they were, I placed fencing behind them for them to grow up. I learned last year, that thick plastic trellis does NOT work well for peas!


(yes the garage is in dire need of painting, hoping to get that done either this summer or next)


The future strawberry patch expansion! As you can see, we have a  little more sod to cut up (hopefully done tomorrow) and then we can plant the 120 plants by Wed (well, 75 anyway, waiting on the rest to be shipped.). Here I had to cut the sod up because the runners the plants will put out need to be able to go into the ground. My plan is to cover with straw before I plant the strawberries, then move the straw where the plants will go so that (fingers crossed) it will keep the weeds/grass from growing back. In the far right is the strawberry patch I did a few years ago, much smaller but produced a significant amount. That is why I decided to expand. Once they are in, there is very little maintenance, and homegrown strawberries put the store bought ones to shame!


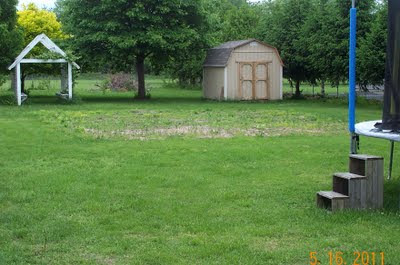
Where the old garden was....we really need to get some good grass seed and hopefully get some grass back in that big ol' plot!


The trampoline was starting to have some "issues". I got on there the other day,cleaned it up, tied the netting straps up so they would stay up and used pool noodles ($1.98 each at Walmart) to replace the nasty, raggedy, old rotting things that came on the poles to begin with. More colorful and thicker to hopefully last longer .


We still have plenty more work to do, but this is the start of our spring.

Wednesday, May 4, 2011

Weekly Chore Chart

If you grew up like me, you were never really taught HOW to take care of you house. I was told to dust every so often (which meant company was coming) or to "clean your room" but never really showed HOW to do it. My mom will tell you, it was just easier to do it herself than to show us how (so don't ask me how my brother learned to clean the bathroom, but he was entrusted with that chore, while I was "dusting"). Through the years, I had friends that would come over and help me "clean" and I would watch in amazement how fast and quickly they did it! Ofcourse it's always easy to clean someone else's house rather than your own. My husband even knew how, evidently his mom was the Queen of Clean....well he married into the Queen on the unclean! lol  He was able to show me a little, but like my mom, it was easier for him to just do it!

Through the years I would read books on cleaning (so much more fun that actually doing the work) and I would make to do lists, and read more, and make schedules and read more, notice not much in the way of cleaning.... I think that was a huge part of my problem. Finally I started to purg and get rid of alot of JUNK! And started following some of what those books said about cleaning! What do you know, I actually had days where my house was clean!

All that leads me to this, this blog here, this post on this blog. I created this particular blog to help share what I learn. Some about cleaning, and when about other "homemakery" things I learn. If you already know it, just keep hopping over to another blog, but if you are starting out as dense as I was....this might be a good place to start, along with Merry Maids.....

I recently found the most wonderful book on another person's blog. It's called Home Ec 101 by Heather Solos.
I'm going to share a little from her book. Not really word for word and hope I don't get sued for copyright enfringment! It's a really good book and one I highly suggest purchasing (it's not in the libraries at this time). One blogger suggested, (and I plan to use that suggestion) using it as a reference for teaching your kids home ec. So they don't grow up to be like me who has no clue on how to keep a house! :-)

Here is the following schedule she recommends. It's a good start and you can tweek it to fit your circumstances.

Monday: Strip the beds, do all the laundry. This includes putting away the clean laundry, not leaving it in the baskets. Many people do a load a day or stretch it out. We stretch ours out, so I am going to try washing the bedding that I strip off the bed and putting away clean clothes on this day. I plan to strip the beds every other week (which will probably translate to once a month). Really, unless you are rolling around in the mud daily, who really needs to , or has the energy to, strip them every week. Also, wipe down everything in your kitchen. This includes actually lifting items up and wiping the counter underneath them. And if your really feeling it, actually wiping down the item you lifted before you set it down. It says to spend a few minutes doing this, but if your like me, one item alone could take a few minutes! lol So it maybe wiping down one item each Monday, but atleast you will get one more done than you would have before. OR you will spend more than a few minutes, but once you start that, it won't take so long the next time. Ok, this is why it takes me so long to get things done, one thought turns into another then another! I MUST move on....

Tuesday: Spend 15 mins. picking stuff up off the floor. Especially things that clog your vacuum. You can not purposefully clog your vacuum so you can avoid using it. It will just bug you until you get you vacuum fixed. If you have kids, go against your grain and MAKE THEM pick up their own stuff. Yes it would be faster to do it yourself, but they won't learn, and you will be doing it yourself when they are teenagers! Once you have done that, it's time to vacuum. Each week spend a little extra time in a different room. Actually using the attatchements that come with the vacuum (if you still have them). Vacuum the crevices, the couches etc....

Wednesday: Errands and Appointments. I really liked her idea of scheduling all the appts you can on Wednesdays. Then also plan all your errands on that day. It would be so much easier to not have to remember all the different days appts are on if you always schedule them on Wed. I have not done this yet, but I have started. Made an appt today for a Wed later in the month. Now to remember to plan everything else for that day. This includes any service calls etc.... Also since you will be in your car, take the time to clean up the car a bit. pick up any trash, if you have the time, maybe run through the car wash or vacuum it out. Clean up the entry way to your home. As you go in and out of the house look at it as a guest would.

Thursday: Clean the bathrooms......that's enough work for one day! I might even suggest eating out that night!

Friday: Kitchen duty. You might think, hey, I wiped it all down on Monday, well did you really think it was going to stay clean all week? Or that there wasn't more to the kitchen than the counters? This is the day you get to walk around the house (or again put the kids to work) and find all the dishes left through out the house and get them to walk themselves into the kitchen. Go through the fridge and find any science projects growing in there. Sweep and Mop the floor. You know what you SHOULD be doing. Just look at it as if you were a stranger coming in. What would gross them out?

Saturday: use this day as project day. Be it yard work, or painting or sewing. Any big project you have going on. By the way, despite what your conscience tells you, it's O.K. to use one or two Saturdays to do something *gasp* FUN!

Sunday: Planning day! Gather library books, plan you menus, your shopping list, look at your appts. all that fun stuff, so you are not suprised during the week. Also kind of relax on this day. You will be able to do so much more the rest of the week if you are able to just relax one day. AFTER returning home from church ofcourse! :-)

And that concludes this episode of "How Do I Do This".

Tuesday, May 3, 2011

Gimme a "G" !!


How cute did these turn out! Gracie is really into the peace signs and bright colors right now. I had bought these wood letters to do this with, for her birhday (at the begining of Feb!!) and just finally got to them and got  them finished!
I had bought her a scrapbook paper pack for Christmas that had this paper in it. Luckily it had several of each sheet. 
First, I traced the letters on the paper. I cut inside the traced line, as the line itself was a little bigger than the actual letters.
Next, I paintd the letters black and let them dry. This way I didn't have to worry about getting paint on the paper.
 Next I Modg Podged the paper onto the letters and voila!
The letters alreadyhad places on their backs for a nail to hold them up. So I lined the letters up, measured the distance between each nail hole thing, and then marked them on paper.
Then I taped he paper on her wall and put the nails into the wall following that guideline. Gracie had asked why I was taping a piece of paper on her wall. I told her I thought it would look pretty, didn't she think so? HA HA!

Once they were up, especially next to her blue walls, I was so pleased, as was she! Who'd have thought something so simple could turn out sooo cute!