Monday, November 14, 2011

processing cushaw squash

So my Dad had told me last year that he looked for Cushaw Squash but could not find any, anywhere, so I found the seeds in a catalogue and planted some this year. When they first grew, I thought I was supposed to pick them whe they were like the size of zucchini. When my Dad saw, he was like "well, I remember them being alot bigger". So I went online and did a bit of research. YES! they should have been much bigger, so I had to wait until fall (which I should have done with the first ones anyway) to harvest some of the others that got to be much larger, as you can see in the picture below.


The one below made 19 cups of puree'! I ended up giving the rest away. I figured that would take me a pretty long time to use up! lol


So the first thing I did was fill my pot with 1"-2" of water, then cut up the stem into chunks that would easily fit in my pot...


However, here is the disclaimer! After handeling the squash this far, I realized all that water that kept beading up on the squash, then becomes a hard film on your hands that even with a scrub brush is hard to get off. SO WEAR GLOVES!


Once done with the stem, I scraped the the seeds out, as you would with a pumpkin. Continue cutting into chunks.


Bring the water to a boil, and then cover with a lid and turn down temp. Let steam until flesh is soft. Then I used prongs to lift the pieces out. As I took out each piece, I layed it on it's side and cut the rind off. It cuts real easy, like going through butter....


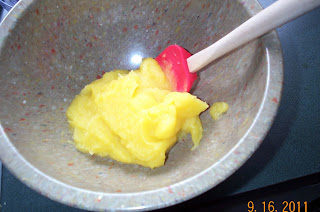
Then I put the pieces in my Ninja processer and puree'd until all smooth.


Like I said, that one squash gave me 19 Cups. The recipe I have only called for a cup and a half for one pie. I tasted it, and as I had read, it was very similar to pumpkin, only sweeter.


Cushaw Squash Pie
1 1/2 C Squash
1 C milk
1 C sugar
little salt
1/4 tsp nutmeg
1 tsp vanilla (I sometimes put a bit more in)
2 eggs
1 Tb butter
Mix all together and pour into unbaked pie crust. Sprinkle cinnamon on top.  Bake at 350 for about an hour or until toothpick comes out clean.

Thursday, September 15, 2011

My sewing projects

So I think I have sewed more this year, than in all my previous years put together. Not sure I am getting any better, but I certainly am getting quicker! Ha! Ha! I think having my "craft room" actually accessible helps ALOT, not to mention having to sit in there at my desk while Gracie does homeschool, gives me more time on my hands. SOOO I have taken on the task of trying to "cuten up" my room, so it's more enjoyable to be in. I decided to go with the "vintage retro" theme and have had alot of fun so far. But more on that later. THIS post is about the projects I have done this year......


One of the things I did was make my own handkerchiefs. The ones I had were pretty old, and between my allergies and colds in this house, we were going through kleenex like it was water. Not to mention those stupid things after they go through the washing machine. So I went and found some cute material and made up some new hankies.

THEN I got to looking and decided Flannel would be softer on the nose, especially when one has a cold and raw nose, so got some cute flannel material and made some flankies!! Those are our favorite by far! Not to mention how much money we have saved on Kleenex and trash bags from all the dirty ones! haha!

Next, when I decided to move this nice LOONG table into the kitchen, I still wanted to be able to store stuff underneath, but did not want everyone to see my pots and pans under there! So I made up this cute little curtain and used velcro to attatch it to the table!


Another thing I have to do sometimes is come up with quick solutions to problems like, when your daughter needs to look like a pirate for theme night at church. Well, then an eye patch and sash (not pictured) made out of scrap material, is just what this mission called for.


Sometimes, a gift is needed, sometimes said gift is a gag gift, such as an oversized bib for someone who drops food on their shirts alot! haha!

It also has been nice to be able to recover some swing cushions my mom gave me to go on a swing we almost threw out, but was able to make look nice again!

This is what I call a no sew project, but it uses fabric so I included it anyway, I needed a lampshade to work in my "vintage retro" craftroom, and Loved this material for it, plus it was scraps I had from making some shorts for Gracie!

So finding cute clothes that are modest and look nice on a LITTLE girl (even though she doesn't seem so little any more, she still is ONLY 10!) can be challenging. I found a really cute pattern at JoAnn's and got some material on sale.... PLUS I could cutomize it to fit HER shape and to close up the back, which on the pattern was a bit more open. LOVE customizing!

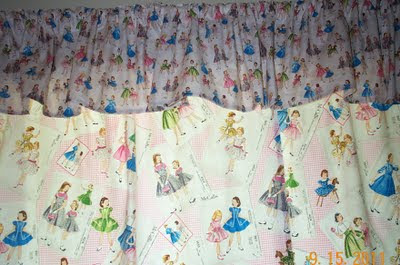
 I had found some really cute material at JoAnn's. At the time, I was not sure what I was going to do with it until I came up with my "vintage retro" (are you tired of hearing that?) theme. Then it was obvious this material was perfect for curtains! And I just got them  hung up today!  yea!

This is the material closer up, sooo cute! It's supposed to be sewing patterns on the bottom curtain, and girls wearing dresses from the 50's on top! 

Lastly, the blue pillows are a pair I recovered with some soft flannel material. The pillowcases behind the blue pillows I made for a Christmas present last year, as well as the blanket.
I have also made lots of shorts, hemmed lots of pants, made more curtains, and many more things I can't think of right now. But safe to say, I have def made good use of the sewing machine I bought years ago!  

Saturday, September 10, 2011

Crockpot meals


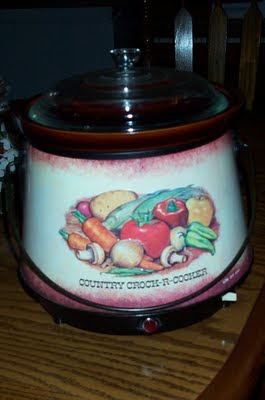
I am so excited about "the crockpot girls" new facebook page. It has brought a resurgence of crockpot users out into the open and along with them, tried and true recipes! AND it's free, I do not have to go buy yet another recipe book, I can pick and choose which recipe I want to copy and paste and make my own book! It also has brought along other crockpot pages which I have been enjoying. The crockpot works well for me, as I am able to plan ahead and once I get things going in the morning, no matter how the rest of my day goes (never as planned that is the ONE for sure thing) I know I have a homecooked meal ready for supper. Over the next few weeks I am going to be trying several new recipes I have picked out (hoping to adopt some new favorites) and am going to post on here to share and so if I ever loose the recipe, it's on here!

Tonite's new meal was : Slow Cooker pork chops, it was very good. I was concerned about how tender these really thick porkchops would get. But they did become very tender. I ended up using 6 because we only came across packs of 3 at our store. Also, the liquid was not very deep, so I had to keep turning them over, but next time I think I would double the liquid ingredients to avoid that problem. Another thing, the red pepper did NOT make this spicy at all, you didn't even know it was there, but it did add to the flavor, DO NOT omitt it. And last but not least, being the scatter brained person I am, I did forget to add the cornstarch and water mixture at the end, but it was still very good! I think I will try it next time. But my family def requested I make this again! Yea, we can add one more recipe to help make more variety to our weekly menu!!!  Next time I make it, I will hopefully think to take a picture and add to this post.

 Slow Cooker PorkChops
2 tablespoons extra-virgin olive oil


4 pork chops, about 1-inch thick

Salt and pepper for seasoning

2 cloves garlic, finely minced

1/4 cup reduced-sodium soy sauce

1/4 cup low-sodium chicken broth

2 tablespoons packed light brown sugar

1/4 teaspoon red pepper flakes

1 tablespoon cornstarch

1 tablespoon cold water

Mashed Potatoes or Hot Cooked Rice (for serving)


In a large 12-inch skillet, heat the oil over medium-high heat until it is simmering and hot. Season the pork chops on both sides with salt and pepper. Brown the pork chops for 1-2 minutes on each side in the hot oil until golden. Transfer the chops to the slow cooker. Add the garlic to the drippings in the skillet and stir constantly over medium heat until the garlic is aromatic and golden (but not burned or it will turn bitter!). Stir in the soy sauce, broth, brown sugar and red pepper flakes; cook and stir until sugar is dissolved. Pour over chops.

Cover the slow cooker and cook on low for 7 to 8 hours until the meat is tender. If using bone-in pork chops, fish out the bones from the slow cooker. Remove the chops from the slow cooker to a shallow pan or plate – they will most likely be falling apart in tenderness at this point. In a small bowl, combine the cornstarch and cold water until smooth. Whisk the cornstarch slurry into the sauce in the slow cooker. Return the chops to the slow cooker. Turn the slow cooker heat to high and cook for 30 minutes to an hour longer, until the sauce is slightly thickened. If you want a super duper thick sauce, once you remove the chops from the slow cooker, pour the sauce into a pan and place it over medium heat on the stove. Add the cornstarch slurry and bring the sauce to a boil. Boil for 1-2 minutes until the sauce is thick. Add the pork and heat through.
Serve the tender chops over potatoes or rice and garnish with green onions, if desired.

Wednesday, September 7, 2011

Vintage Aprons


I am a fanatic about vintage aprons, so you can imagine my excitement when I saw this book at JoAnn Fabric! While I stil haven't found "the one" apron pattern I am always searching for, the ones in this book were pretty darn cute! Just one more of my finds I wanted to share and encourage you to check out! Below I have shared just some of the aprons in the book, they also have detailed instruction on how to make them alng with an envelope in the back of the book with the patterns in it. They also have patterns for some cute oven mitts (two different kinds) as well as a table runner and placemats! Hope you enjoy it as much as I do!


Homestead Blessings

In my never ending effort to learn more homemaking skills, I read on someone else's blog (can't remember who now) about the video series Homestead Blessings. Again, back to the library for me and low and behold, they had several and what they didn't have, they did at another library so I could put them on hold and get all of them! I was not disappointed. There was one on cooking, gardening, sewing, canning, herbs, etc.... I put them in the player, took out a little notepad, watched, took my notes and applied them all! I had the basic knowledge of all of the above, but there was something new in all of them that I did NOT know.

For instance in the sewing one, I read about the idea to look for fabric in different places, such as a bed skirt for a bed at a rummage sale, could be used to make a new skirt, with the ruffle already done for you! or using some cute sheet sets to make curtains or a tablecloth out of!

The canning one, was really nice to be able to actually SEE someone do the canning! I had read and read, but really wanted to see someone DO it. It helped boost my confidence in that alot! Plus it gave me some quick, easy recipes for canning.

The gardening one, showed me how I can use just straw to grow potatoes in instead of having to plant them!

The cooking one, showed me about browning a roast on all sides in the pan before roasting it, because it helps lock in the juices! PLUS it showed me how to make the gravy I had yet to figure out, atleast an edible version of some!

So I definetly would HIGHLY recommend checking out the series at a library near you!

Make Ahead Mixes


So, in order to try to save money and be more aware/careful of what is in the food we eat, I found some books at the library on making my own "mixes". So far I have been really pleased! I started out kinda small, I made three mixes and there is a long list of recipes I can make with those mixes. Plus, I know EXACTLY what has gone into the food, I can buy the ingredients in bulk and have them on hand and so far, the quality of taste is sooo much better! Below I have the first book I checked out at the library and the first mix I made up and used. I have to say, my family all agreed, it was way better than any boxed mix I have made in the past. But I will say, when making your mixes, DO NOT get distracted! I made the mix up, and went to make the brownies and they were not very moist in the mixing bowl, so i added some oil and another egg in order to even get it to slightly resemble a regular mix. I tasted the batter and it was bitter! I thought, "oh well maybe it will be better once it's baked".....NO it wasn't! I kept rereading the recipe, I had followed it completely, then I went back to the mix recipe.......ya, I really did NOT remember adding the sugar in that mix! So I recalculated due to already making one batch out of it, and added the sugar, and remade them......Let me tell you how much better brownies with sugar taste than ones without!!! Anyway, I am super excited to try out some of the other recipes and to make up some cute Mason jar mixes to give out at Christmas!


Monday, May 16, 2011

Spring Work

Well, another Spring, means more yard work!  Ha Ha! That's O.K. One day, we will have it all figured out and there will not be so much, but I have yet to figure out what works. I have figured out what does NOT work! Like last years garden! I spent so much time weeding it, I never had time to work in other areas of the yard! Not to mention my skin not caring for all the weeds and such! So this year, I not only downsized the garden, (I give up on growing corn or potatoes) but I also tried to make it as maitenance free as possible.

First, I covered the ground with cardboard boxes, then newspaper, then I laid lanscaping fabric down.
Second,  came the mulch (I used the cheap stuff , $2 a bag, as I add to it each year and don't need as much I may buy the more expensive weed control mulch).
Next, I laid out the boxes ( I had already made them a couple years ago, use untreated wood, and if you know what measurements you need, they will cut it for you at the hardware store). I made sure I had them exactly where I wanted them allowing room for growing plants that will grow well over the boxes.
Next,  I filled the boxes with soil I bought at Menards. I got the cheapest kind specifically for vegetables, I think I paid like $2-$3 a bag.
Finally, I planted the tomatoe and green pepper plants I had started from seed a few months ago and then planted the seeds of everything else in each appropriated (big word huh! ) box.
We'll see how this plan works.
OH! I almost forgot, I also had planted a row of peas in the ground there in the far back, I just cut places in the fabric ( I did not use boxes or newspaper here, I just cut up the sod and laid the fabric down and covered with mulch) where I planted the peas. Once they started coming out of the ground and I could see where they were, I placed fencing behind them for them to grow up. I learned last year, that thick plastic trellis does NOT work well for peas!


(yes the garage is in dire need of painting, hoping to get that done either this summer or next)


The future strawberry patch expansion! As you can see, we have a  little more sod to cut up (hopefully done tomorrow) and then we can plant the 120 plants by Wed (well, 75 anyway, waiting on the rest to be shipped.). Here I had to cut the sod up because the runners the plants will put out need to be able to go into the ground. My plan is to cover with straw before I plant the strawberries, then move the straw where the plants will go so that (fingers crossed) it will keep the weeds/grass from growing back. In the far right is the strawberry patch I did a few years ago, much smaller but produced a significant amount. That is why I decided to expand. Once they are in, there is very little maintenance, and homegrown strawberries put the store bought ones to shame!


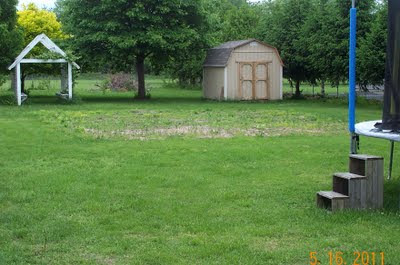
Where the old garden was....we really need to get some good grass seed and hopefully get some grass back in that big ol' plot!


The trampoline was starting to have some "issues". I got on there the other day,cleaned it up, tied the netting straps up so they would stay up and used pool noodles ($1.98 each at Walmart) to replace the nasty, raggedy, old rotting things that came on the poles to begin with. More colorful and thicker to hopefully last longer .


We still have plenty more work to do, but this is the start of our spring.

Wednesday, May 4, 2011

Weekly Chore Chart

If you grew up like me, you were never really taught HOW to take care of you house. I was told to dust every so often (which meant company was coming) or to "clean your room" but never really showed HOW to do it. My mom will tell you, it was just easier to do it herself than to show us how (so don't ask me how my brother learned to clean the bathroom, but he was entrusted with that chore, while I was "dusting"). Through the years, I had friends that would come over and help me "clean" and I would watch in amazement how fast and quickly they did it! Ofcourse it's always easy to clean someone else's house rather than your own. My husband even knew how, evidently his mom was the Queen of Clean....well he married into the Queen on the unclean! lol  He was able to show me a little, but like my mom, it was easier for him to just do it!

Through the years I would read books on cleaning (so much more fun that actually doing the work) and I would make to do lists, and read more, and make schedules and read more, notice not much in the way of cleaning.... I think that was a huge part of my problem. Finally I started to purg and get rid of alot of JUNK! And started following some of what those books said about cleaning! What do you know, I actually had days where my house was clean!

All that leads me to this, this blog here, this post on this blog. I created this particular blog to help share what I learn. Some about cleaning, and when about other "homemakery" things I learn. If you already know it, just keep hopping over to another blog, but if you are starting out as dense as I was....this might be a good place to start, along with Merry Maids.....

I recently found the most wonderful book on another person's blog. It's called Home Ec 101 by Heather Solos.
I'm going to share a little from her book. Not really word for word and hope I don't get sued for copyright enfringment! It's a really good book and one I highly suggest purchasing (it's not in the libraries at this time). One blogger suggested, (and I plan to use that suggestion) using it as a reference for teaching your kids home ec. So they don't grow up to be like me who has no clue on how to keep a house! :-)

Here is the following schedule she recommends. It's a good start and you can tweek it to fit your circumstances.

Monday: Strip the beds, do all the laundry. This includes putting away the clean laundry, not leaving it in the baskets. Many people do a load a day or stretch it out. We stretch ours out, so I am going to try washing the bedding that I strip off the bed and putting away clean clothes on this day. I plan to strip the beds every other week (which will probably translate to once a month). Really, unless you are rolling around in the mud daily, who really needs to , or has the energy to, strip them every week. Also, wipe down everything in your kitchen. This includes actually lifting items up and wiping the counter underneath them. And if your really feeling it, actually wiping down the item you lifted before you set it down. It says to spend a few minutes doing this, but if your like me, one item alone could take a few minutes! lol So it maybe wiping down one item each Monday, but atleast you will get one more done than you would have before. OR you will spend more than a few minutes, but once you start that, it won't take so long the next time. Ok, this is why it takes me so long to get things done, one thought turns into another then another! I MUST move on....

Tuesday: Spend 15 mins. picking stuff up off the floor. Especially things that clog your vacuum. You can not purposefully clog your vacuum so you can avoid using it. It will just bug you until you get you vacuum fixed. If you have kids, go against your grain and MAKE THEM pick up their own stuff. Yes it would be faster to do it yourself, but they won't learn, and you will be doing it yourself when they are teenagers! Once you have done that, it's time to vacuum. Each week spend a little extra time in a different room. Actually using the attatchements that come with the vacuum (if you still have them). Vacuum the crevices, the couches etc....

Wednesday: Errands and Appointments. I really liked her idea of scheduling all the appts you can on Wednesdays. Then also plan all your errands on that day. It would be so much easier to not have to remember all the different days appts are on if you always schedule them on Wed. I have not done this yet, but I have started. Made an appt today for a Wed later in the month. Now to remember to plan everything else for that day. This includes any service calls etc.... Also since you will be in your car, take the time to clean up the car a bit. pick up any trash, if you have the time, maybe run through the car wash or vacuum it out. Clean up the entry way to your home. As you go in and out of the house look at it as a guest would.

Thursday: Clean the bathrooms......that's enough work for one day! I might even suggest eating out that night!

Friday: Kitchen duty. You might think, hey, I wiped it all down on Monday, well did you really think it was going to stay clean all week? Or that there wasn't more to the kitchen than the counters? This is the day you get to walk around the house (or again put the kids to work) and find all the dishes left through out the house and get them to walk themselves into the kitchen. Go through the fridge and find any science projects growing in there. Sweep and Mop the floor. You know what you SHOULD be doing. Just look at it as if you were a stranger coming in. What would gross them out?

Saturday: use this day as project day. Be it yard work, or painting or sewing. Any big project you have going on. By the way, despite what your conscience tells you, it's O.K. to use one or two Saturdays to do something *gasp* FUN!

Sunday: Planning day! Gather library books, plan you menus, your shopping list, look at your appts. all that fun stuff, so you are not suprised during the week. Also kind of relax on this day. You will be able to do so much more the rest of the week if you are able to just relax one day. AFTER returning home from church ofcourse! :-)

And that concludes this episode of "How Do I Do This".

Tuesday, May 3, 2011

Gimme a "G" !!


How cute did these turn out! Gracie is really into the peace signs and bright colors right now. I had bought these wood letters to do this with, for her birhday (at the begining of Feb!!) and just finally got to them and got  them finished!
I had bought her a scrapbook paper pack for Christmas that had this paper in it. Luckily it had several of each sheet. 
First, I traced the letters on the paper. I cut inside the traced line, as the line itself was a little bigger than the actual letters.
Next, I paintd the letters black and let them dry. This way I didn't have to worry about getting paint on the paper.
 Next I Modg Podged the paper onto the letters and voila!
The letters alreadyhad places on their backs for a nail to hold them up. So I lined the letters up, measured the distance between each nail hole thing, and then marked them on paper.
Then I taped he paper on her wall and put the nails into the wall following that guideline. Gracie had asked why I was taping a piece of paper on her wall. I told her I thought it would look pretty, didn't she think so? HA HA!

Once they were up, especially next to her blue walls, I was so pleased, as was she! Who'd have thought something so simple could turn out sooo cute!


Wednesday, March 16, 2011

Calgon Take Me Away!

Oh my! It has been one of those days
Been a long time a coming, it's headed this way
I know you agree, we have the same thing to say...
"Oh Calgon! PLEASE come and take me away!"

From the minute I woke and my feet hit the floor,
Everyone needing something, and then wanting more,
"How do you spell this?" "Where do I find that?"
Wait, did I just eat a doughnut?! No wonder I'm fat!
"No, you can't, well, maybe, alright, O.K.,"
"Oh Calgon! PLEASE come and take me away!"

I had the day planned, I wrote it all down,
But the schedule I made, is nowhere to be found,
I'm a stay at home mom, I should have plenty of time,
Ya, for dishes, for laundry, but none of it MINE!
My house is a mess, but my family is fed
It's only 1:00! Ugh! I'm ready for bed!
As I look to God, the prayer that I pray..
"Lord please, let Calgon, come and take me away!"

Then I start to think about  a 9-5 job,
But realize, that's just more $ the government can rob,
I love being home, I just really need a break,
From the crazy, the chaos, from the moment I wake
A quiet, long bath at the end of the day...
"Ahh, Calgon, you CAME, and you took me away!"

Thursday, January 6, 2011

Angi's Advice

Years ago, i used to put together a newsletter i called angi's advice. i gathered tips, recipes, stupid trivia etc.... from a bunch of different places and pulled out things i thought we could use. i recently came across my newsletters on my computer. it's been awhile, so i am going to "reprint" them. hope they are useful to someone! hey, maybe even me!!!

Household tips are what these are, I have searched near and I have searched far


I gathered the ones I thought we could use, Hopefully with these tips you can not loose.


Out of muffin cup papers? I cut squares of wax paper and line each tin. It works great, and the muffins are even easier to remove.

To remove odors from the microwave, place a bowl of water with three slices of lemon inside. Cook on high for 30 seconds .

To add a hint of garlic flavor to your salad, rub halved cloves around the inside of the bowl. Your salad will taste delicious.

To remove scorch marks from your iron, rub it with a damp cloth dipped in salt. The marks will come right off so they don’t end up on your clothing.

To thread a needle easier, spray the end with hair spray.

To keep birthday candle wax from melting into the cake, place them in mini marshmallows and the marshmallows into the cake.

To soften butter in a hurry, shred it with a grater. It will soften in no time.

To keep from tearing when cutting an onion, cut it near the stove with the vent fan on.

To get rid of that crusty build up around faucets, soak paper towels in vinegar and wrap around faucets for 10 min. then just wipe away.

To freshen the smell of a room in a hurry, add cinnamon to the vacuum bag. It will scent the room as you clean.

Making oatmeal? Coat the container with a nonstick spray to prevent a sticky mess being left.

Sanitize your dish drainer basket by occasionally popping it in the dishwasher cycle.

Tired of fighting your plastic wrap? Stick it in the freezer, it will be easier to handle and to tear.

Line your pantry with plastic place mats, so if anything spills or drips, it’s easy to clean up.

To keep raisins plump and moist, store them in the refrigerator.

To sharpen your vegetable peeler, use a scouring pad to clean it. The pad will sharpen it.

To clean the dust off of candles, use a cotton ball and a little rubbing alcohol.

Use an old shower curtain as a cover for outside furniture or wherever you would need a tarp

If your going to be wearing a pearl necklace, do not put perfume or moisturizer on your neck, it will dull the beads.

To cut celery quickly with no strings, use a clean pair of kitchen scissors and cut at a slant.

To keep the top of your nail polish bottle from sticking, rub a little Vaseline on the threads.

Easy way to fill a pastry bag, stand it upright in a glass, with edges folded over the rim of the glass and fill.

This winter when static is a problem in your home, fill a bottle with one part liquid fabric softener and five parts water and mist over carpet.

Place a coffee filter between china cups to prevent them from scratching.

To keep fresh mushrooms from going bad too quick, place them in a brown grocery bag and then in your refrigerators produce drawer.

Having a romantic time for two with wine? Put a couple frozen grapes in each glass. It keeps white wine cold and adds a treat at the bottom.

A cheap jewelry cleaner for silver is Alka-Seltzer. Place jewelry in a cup of water with two Alka-Seltzer, wait 5 min., rinse thoroughly and dry with a soft cloth.

When making all those holiday cookies, first put the rolling pin in the freezer for a couple minutes to help keep the dough from sticking to it.

Paint pours out of the can more neatly if you first put masking tape over the edge to keep it from spilling into the ridge of the can.

Before you jump into the shower, fill your sink up with hot water and set your lotion bottle in it. When you come out of the shower you will have nice and warm lotion waiting.

Got scuffs on those black suede shoes? Try rubbing them with a sponge lightly moistened with cool, black coffee.

Use a little baking soda to remove dirt, wax etc...from fresh produce. Just sprinkle a little on, scrub and rinse.

Boost the absorbency of your towels by adding a cup of white vinegar to the rinse water once a month.

To entertain a child while waiting at a restaurant, have them study the table and it’s contents, then have them close their eyes while you remove something. When they open ask them to guess what you took.